Create & Edit Pages
You will need to create new "pages" for your website. These will then be linked from your Main Menu page, which can be a separate page or the home page of your site. To add a page, click the PAGES category at the very top of the editor. The side menu will display new options. Click the plus sign ( + ) next to the word "Pages". Then click the "Standard Page" option (unless you're creating a blog... in which case select "Blog"). You will need to name the new page (like "History" or "Just the Facts" or "Current Events") and then save it. The new page will automatically load the default design. Personally, I would select "No Header" from the Header Type option that appears in the left hand menu under "Create Pages". This eliminates fonts and designs you don't like and allows you to customize the top of each new page (like I did by dropping in my Hartnell University banner).
To start editing the page, click the BUILD category at the very top of the editor. The new left menu will display all the options you have to start building that page. For example, when I created this page, I dragged over the "Image" box and then uploaded the Hartnell University image I had saved. Then I selected the "Spacer" feature and put that underneath it. (The "Spacer" drops in blank spaces. The "Divider" drops in a gray line.) Using the mouse, I shrank the size of the "Spacer" by pulling up on the blue bar at the bottom of the "Spacer" once I dropped it onto my page. (You can adjust the "Divider" by clicking on it once its on your page.) Then I dragged over the "Title" box. I typed in "Create & Edit Pages", highlighted it and selected red for its color. Then I dragged over the "Text" box and dropped it onto my page. This is where you can either start typing or can paste in text. (NOTE: Please be sure to place your sources underneath any text your copy and paste!)
To start editing the page, click the BUILD category at the very top of the editor. The new left menu will display all the options you have to start building that page. For example, when I created this page, I dragged over the "Image" box and then uploaded the Hartnell University image I had saved. Then I selected the "Spacer" feature and put that underneath it. (The "Spacer" drops in blank spaces. The "Divider" drops in a gray line.) Using the mouse, I shrank the size of the "Spacer" by pulling up on the blue bar at the bottom of the "Spacer" once I dropped it onto my page. (You can adjust the "Divider" by clicking on it once its on your page.) Then I dragged over the "Title" box. I typed in "Create & Edit Pages", highlighted it and selected red for its color. Then I dragged over the "Text" box and dropped it onto my page. This is where you can either start typing or can paste in text. (NOTE: Please be sure to place your sources underneath any text your copy and paste!)
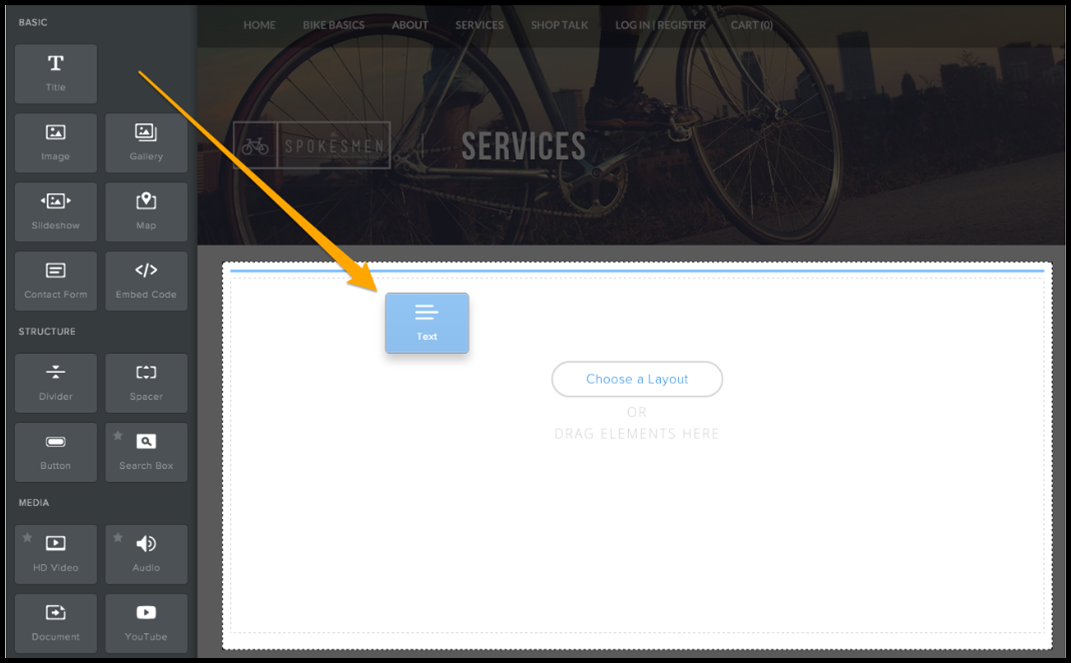
Building a page is nothing more than a drag-and-drop process. [Click picture for a larger version.]
Once you upload or drop in a picture, clicking that picture will give you a menu of options. You can "Edit" or "Replace" the image. If you slide the circle to the right next to the "Lightbox" so that it turns blue, it means if someone clicks on that picture it will appear larger. (This is a good option for maps and graphs.) You can "Link" the picture so if someone clicks it they go to a new page or to a different site. (NOTE: You can't make a picture bigger AND link it. Pick one.) You can align your picture left or right by using the "Align" feature. "Spacing" determines how much white space may appear around the picture so it doesn't appear to "hug" your text. You can add a caption to the picture by clicking "Caption" and typing in what you want. (It's always good to give the viewer an idea of what will happen if they click the picture... "Click picture for a larger version"... or ... "Click picture to visit the XYZ site." Lastly, you can use the "Advanced" features to get fancy and add lines around your picture. Hey... whatever floats your boat.
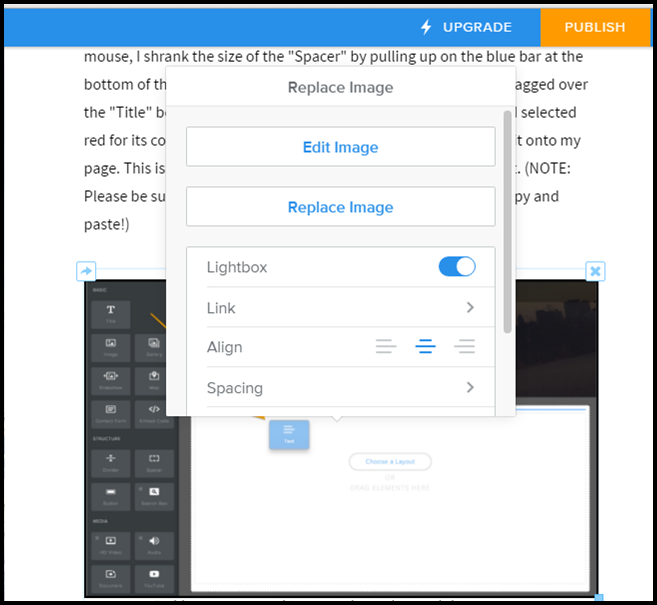
Go ahead. Click this picture to see a larger picture of this picture about selecting the option to make the picture larger. Oooooh. Get all of that?